|
I decided that for my project I would make a plush that lit up with eyes that changed color based on light levels. First I made the base pattern and then enlarged it after deciding that it might not be big enough.  Then I made the prototype sewing the pieces together and glued fake lilypad components to try and find the proper way to make the circuit. 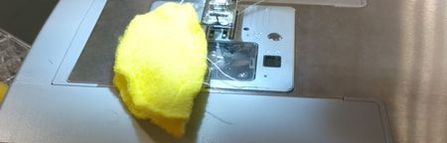 Next I tried the code multiple times but it didn't work as intended though after a lot of testing I discovered that the sensor was indeed working and I added a delay factor since numbers change very quickly. (The tests were using many scrap fabric pieces.) Then I made the pattern with a new head for the final and cut out the components. 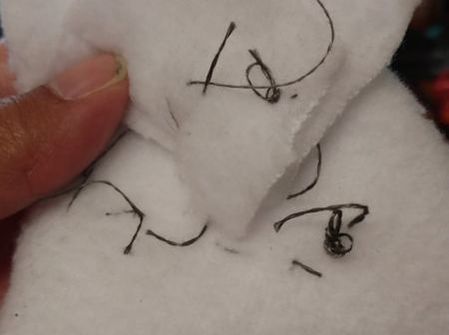 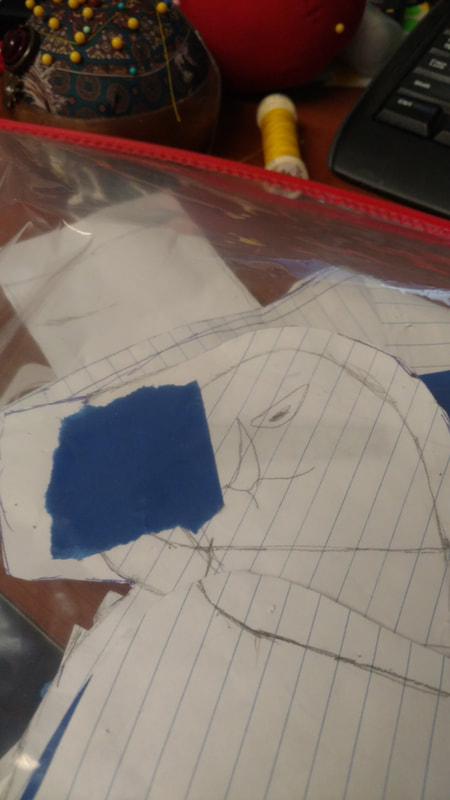 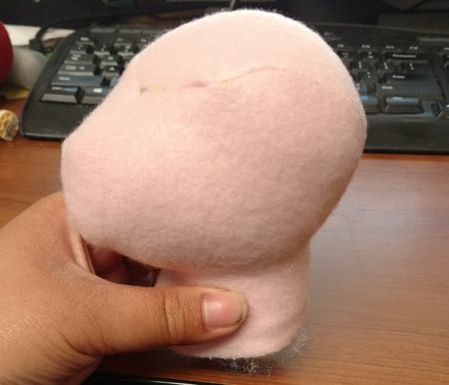  Once I sew the plush together I will attach the lilypad components and test the code further to see why the light sensor does not appear to affect the leds like I want it to.
0 Comments
I decided to start on the beads for my project so I started to create the model in sculptris. I decided that I wanted one that was a bit curvy like the antennae sea slugs have so I used the grab tool for the basic shape, then refined the shape using the grab, smooth, and inflate tools. 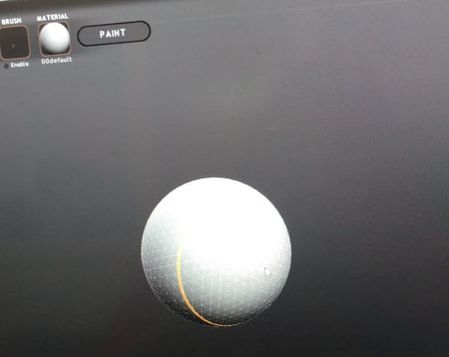 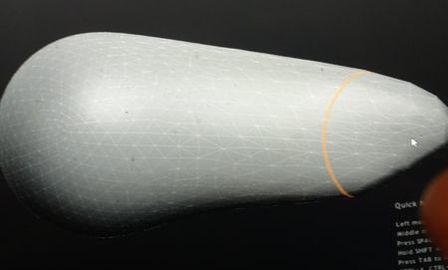 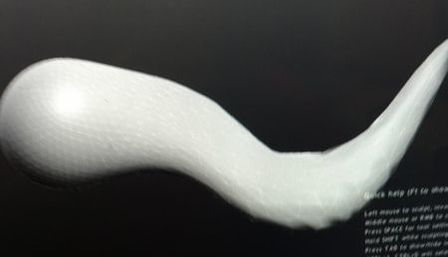 I also flattened the front to get started on my first idea for how to make it into a bead.  Next I imported it into tinkercad, added a cylinder, made it the size I wanted. I then copied it, made the copy a bit smaller, turned it into a hole and grouped the two together so the first one had a hole in it. I also grouped the shape with the cylinder before realizing that I wanted it to be a different way so I turned the cylinder sideways. 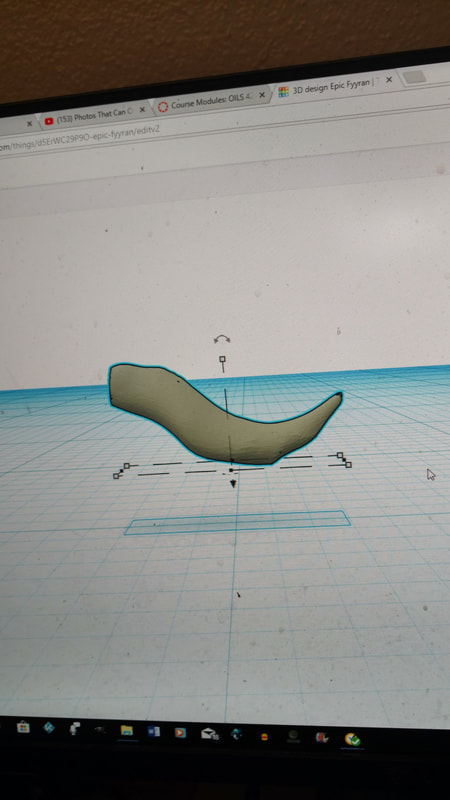 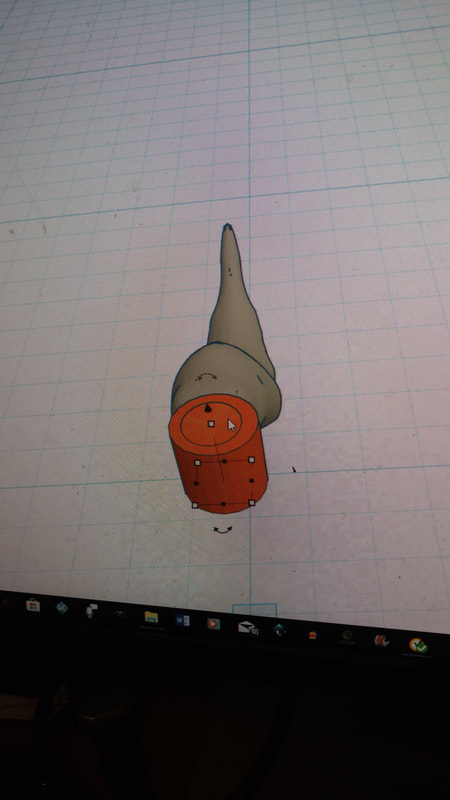 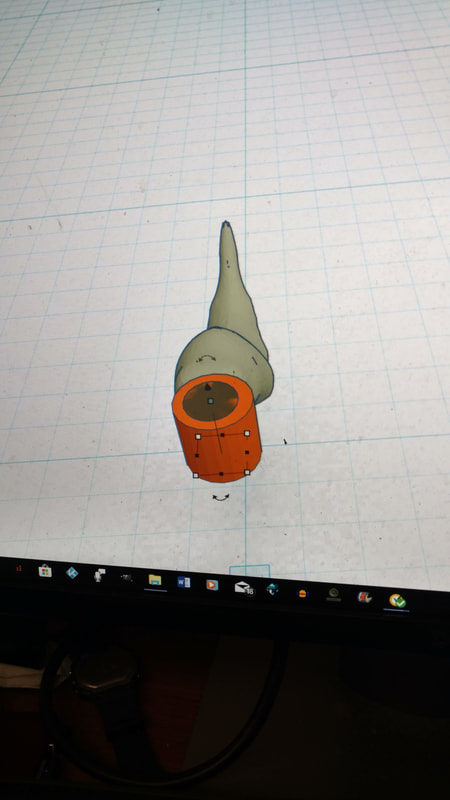 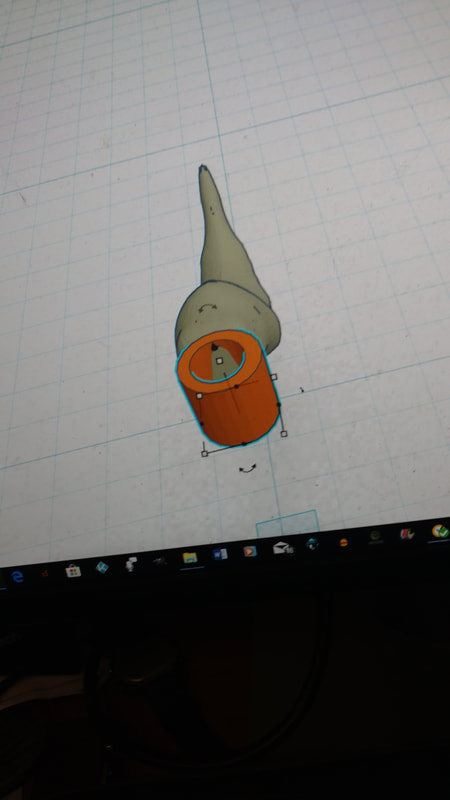 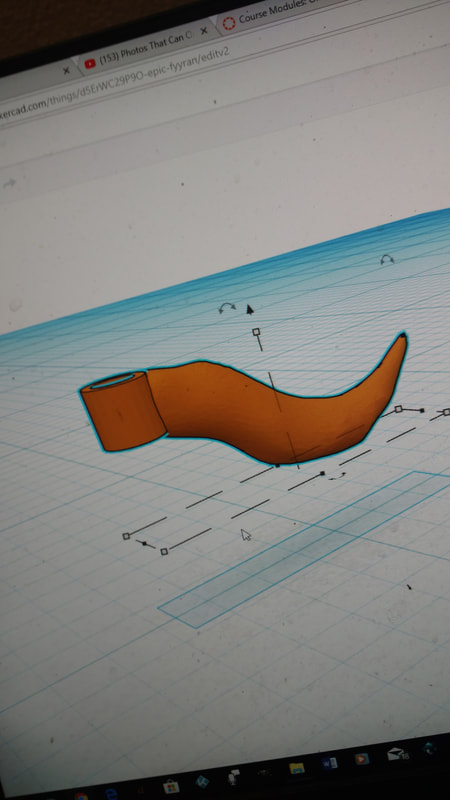 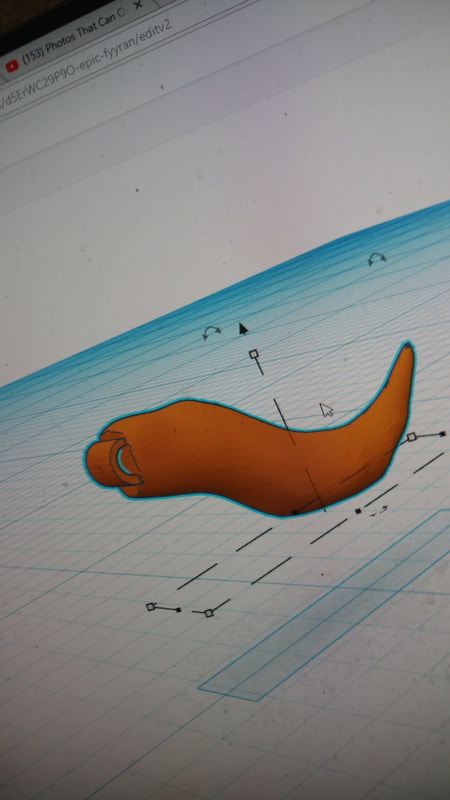 I then created a second design as I was worried about the walls getting too thin if this was scaled down so I put the hole in the shape instead. I then sent both to my dad to 3d print and wanted glow in the dark blue though he tested in white first, which I agreed to. I also had him scale it down after it was way too big. The one with the attached cylinder did not appear to be successful. 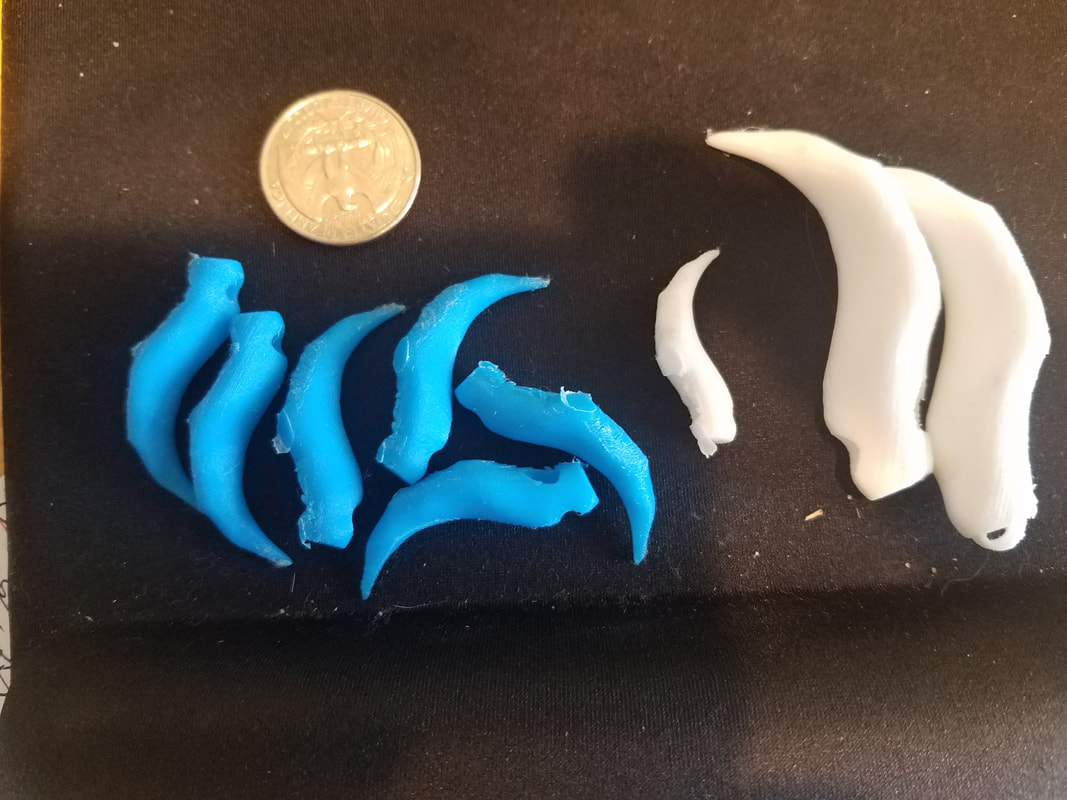 This time I chose another unfamiliar problem by adding further shapes in Sculptris. For this one I tried to create a 4 legged creature based off a sea slug. More specifically the "blue dragon sea slug" or Galucus atlanticus as I am rather fascinated with this creature's appearance and how strange sea slugs look in general since they can really help me be creative with their variety. The model probably took a couple hours as I did this Friday and did not keep track of time, though the printing took several hours.  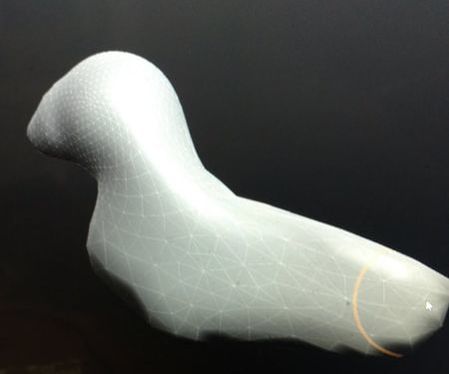 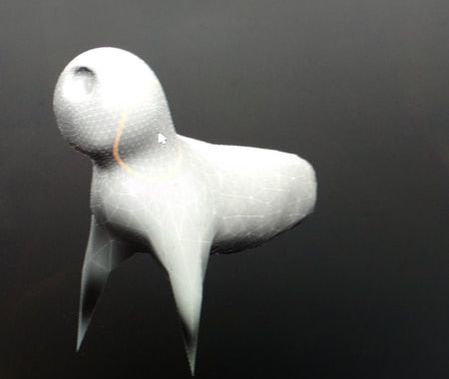 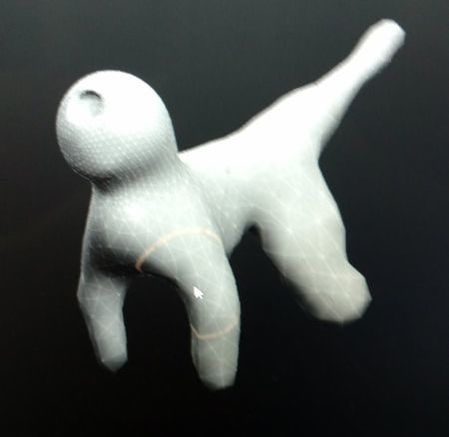 For the first shape I added an additional sphere to the face to make the "eye," then moved and scaled *it was at first close to the head in size* the sphere until it was at the right size and place.  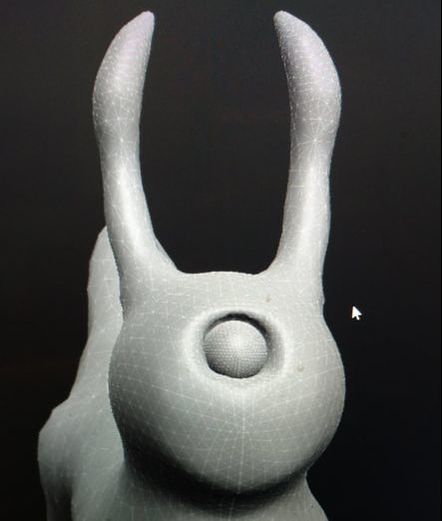 At first I tried a plane for the wings but that didn't work out, because at least I don't know how to make planes thicker, so I did more spheres instead. 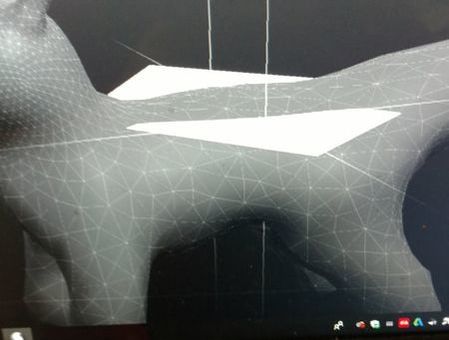 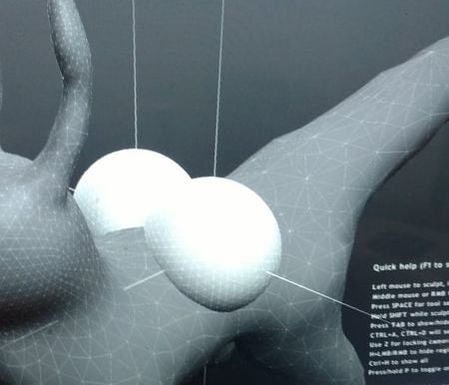 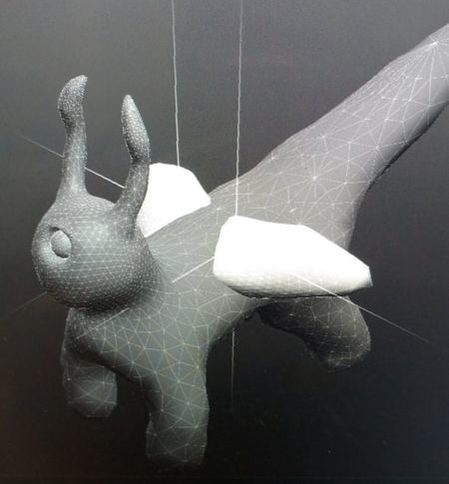 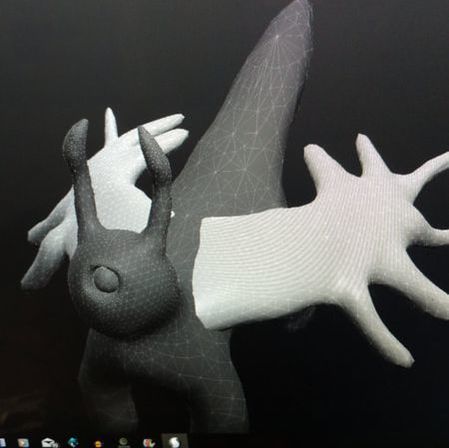 Then I began to edit the body and feet. The feet I did by adding a bit of extra polygons using the draw then grabbing the feet, same with the tail, the back was simply grabbed. 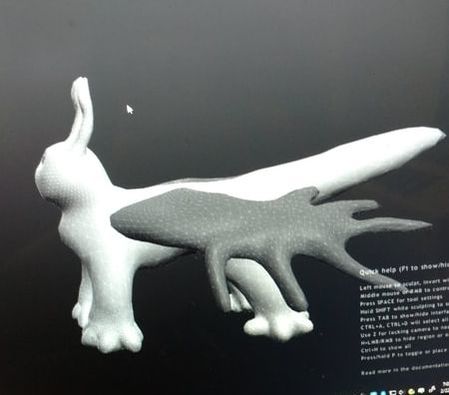 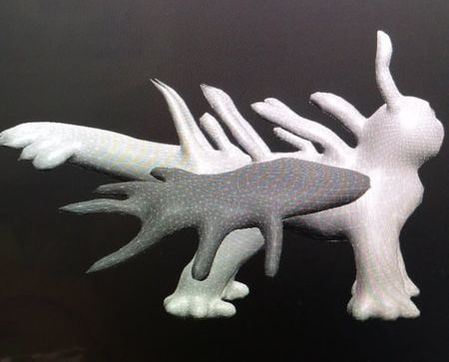 I then exported it, realized that there weren't enough polygons so I subdivided it then exported again. I think I also fixed the feet a bit. 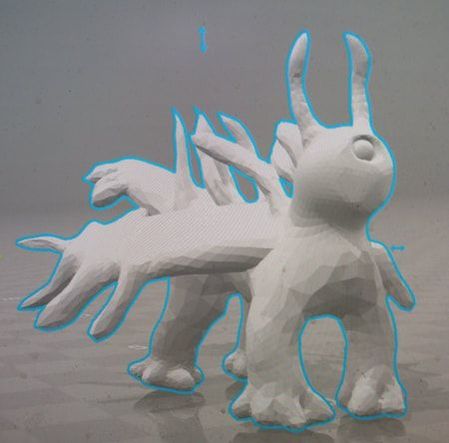 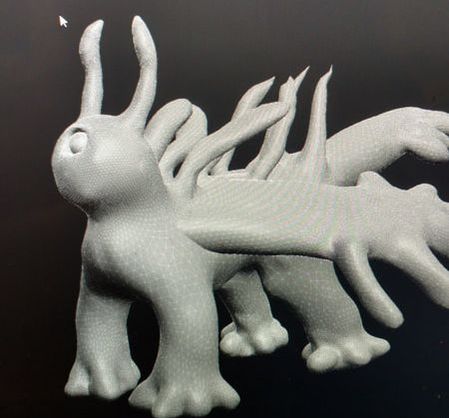 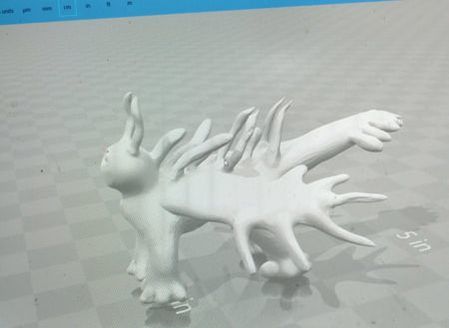 I then sent the model to my dad, we talked about which filament to use and I decided on transparent blue PLA. However the model failed to print 2 times before it succeded, first the rasberry pi that the 3d printer used broke so a sd card had to be used instead, then the supports broke so more needed to be added. The rough edges and broken back part are from the supports. I was rather frustrated especially since I needed this printed by Saturday as my family would come over that day so we couldn't print it then. 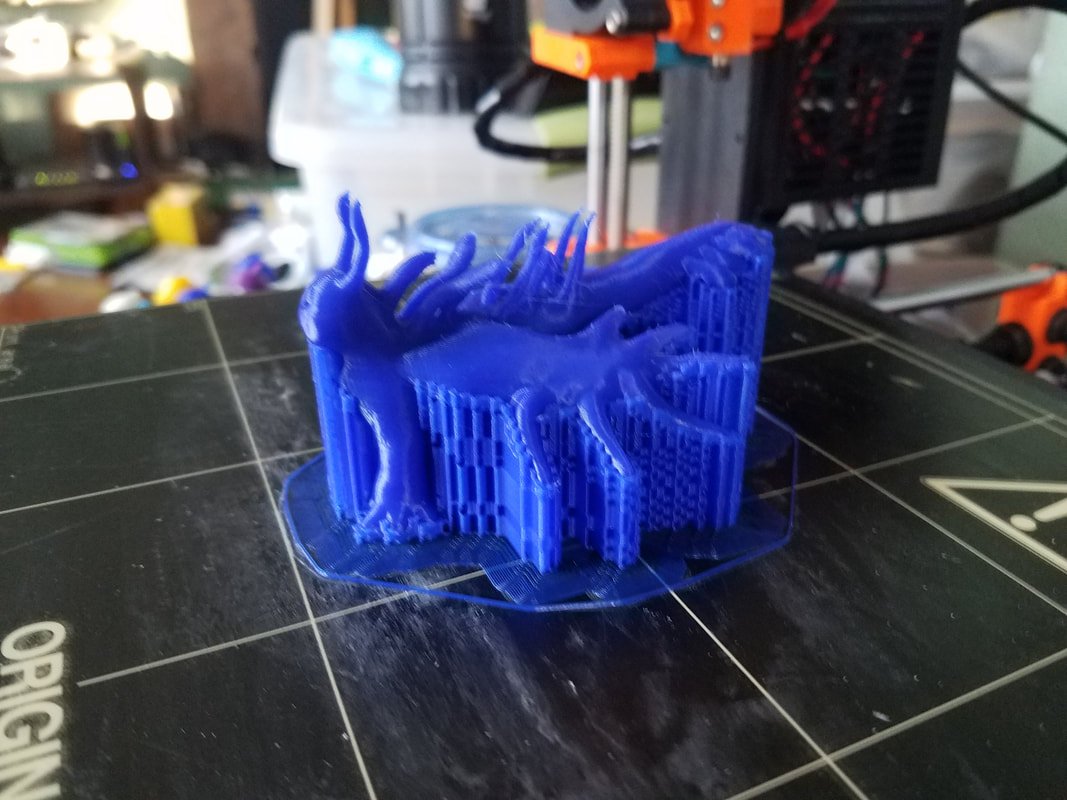 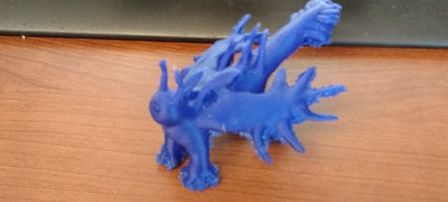 I believe that this would be an unfamiliar problem as this is the second time I have used sculptris. In this program you sculpt out the model mainly relying less on combining shapes and using geometry then other programs, it allows for much more organic models than blender. To start with I used the grab tool to move out some antennae and the face, and attempted to make it bigger with the draw tool. Used the invert option on the draw tool to make the face bigger while using the inflate tool on the antennae, though I realized I didn't like the face too much so I tried to press it back in, and noticed that it looked flat so I got the idea from the star nosed mole and grabbed areas of the face to get that effect. I also grabbed a portion of the clay ball to make the neck.  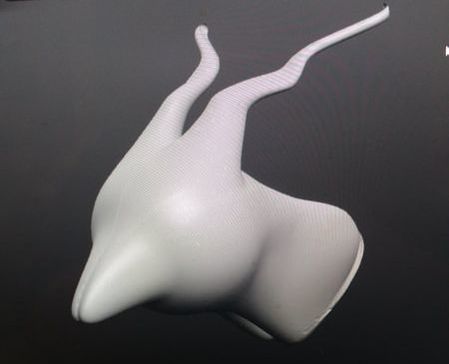 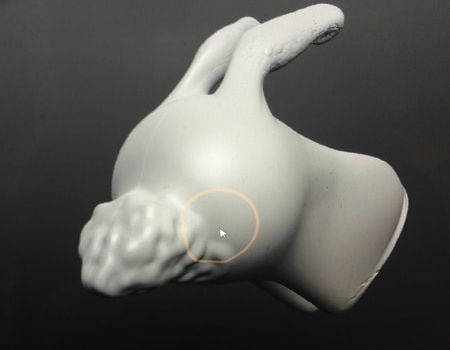  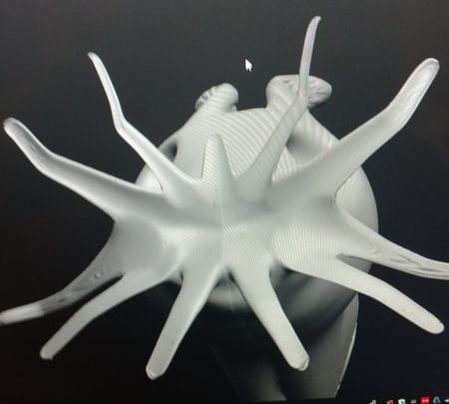 I then made the neck longer to create the body, grabbed a portion for the arms, "wings," legs, and tail, using the inflation tool to make the arms and legs more 3d, then grabbed fingers and claws on the feet, the tail unfortunately did not turn out that well despite numerous attempts to fix the texture. 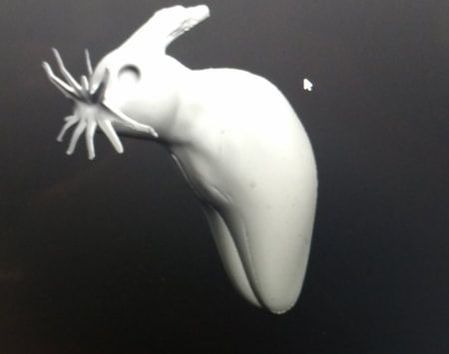 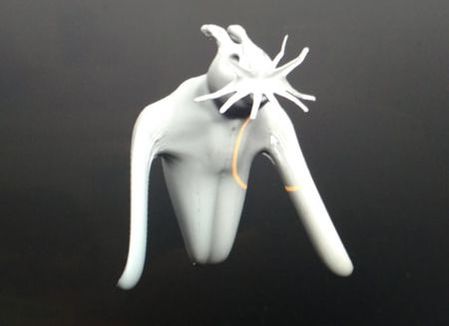 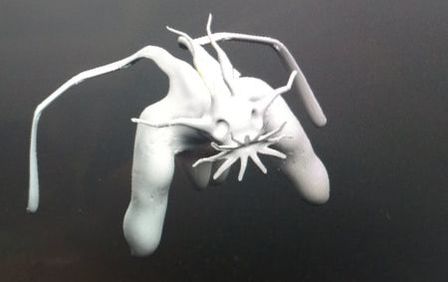 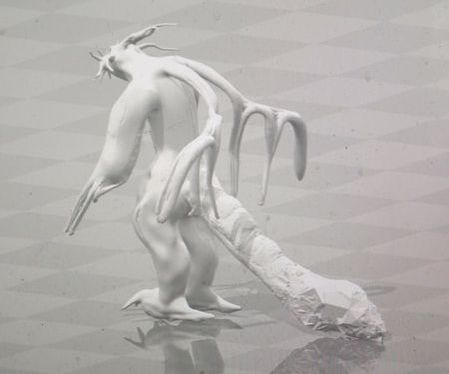 The model wound up having too many polygons to 3d print, so I looked up more information and found out that if the detail slider is at 0 it does not add new polygons and only edits existing one so I remade the model only having the detail slider on when I absolutely needed more polygons. 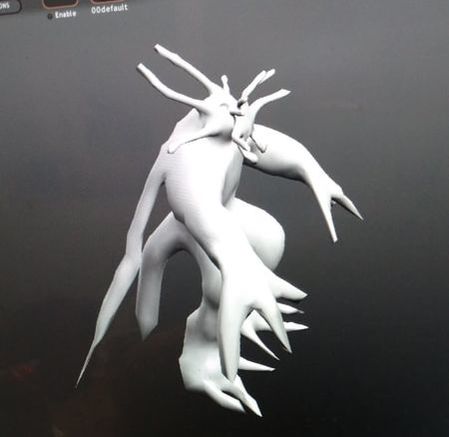 It also looks better as the texture problems did not occur as often, though I realized that I forgot the other prongs on the wings. I then sent this one to my dad and it had too few polygons so I applied a subdivision and used the "draw" tool with detail on to add more polygons to areas that were still low poly, I also improved areas of the model. Here's a turnaround of the finished model. Unfortunately the model failed to print a few times and still hasn't been successfully printed yet as it needs stronger supports. I'm now attempting a different approach by breaking the model into pieces using tinkercad's hole system which involves an option to put an object as a hole then grouping it with an object to delete a portion of the object to separate the model then using it again to create ball and socket joints. I also tried to replicate the original's wings using this system and additional joints. I don't think I'll print this one yet though as it would be best to get it shortly after it prints to make sure all the pieces are put together properly. 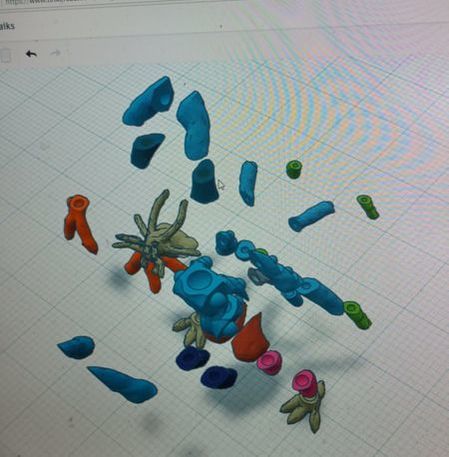 My dad successfully printed it now, though the top antennae broke off while he was removing the supports. I chose glow in the dark PLA as we now have more colors to choose from. 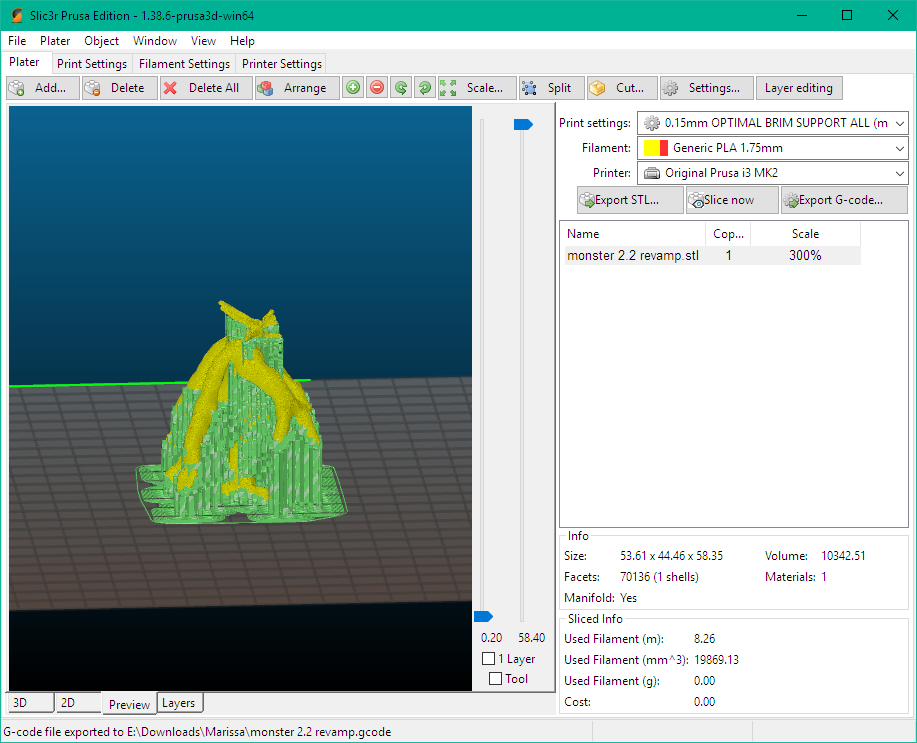 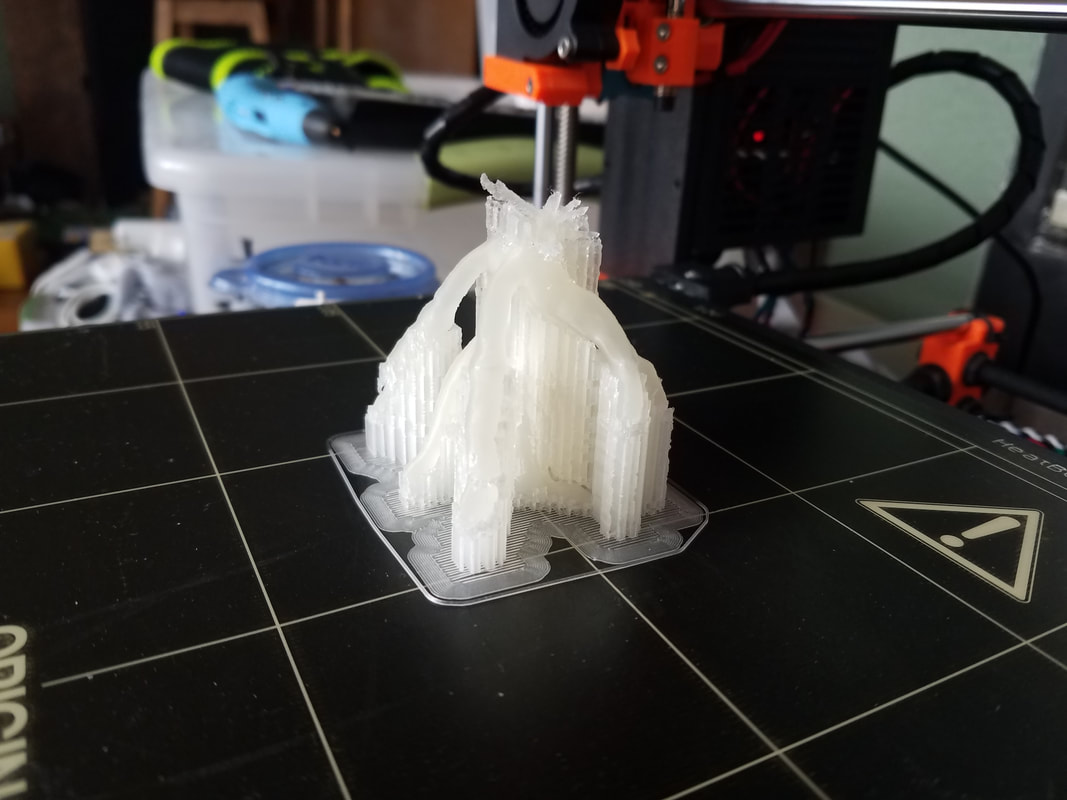 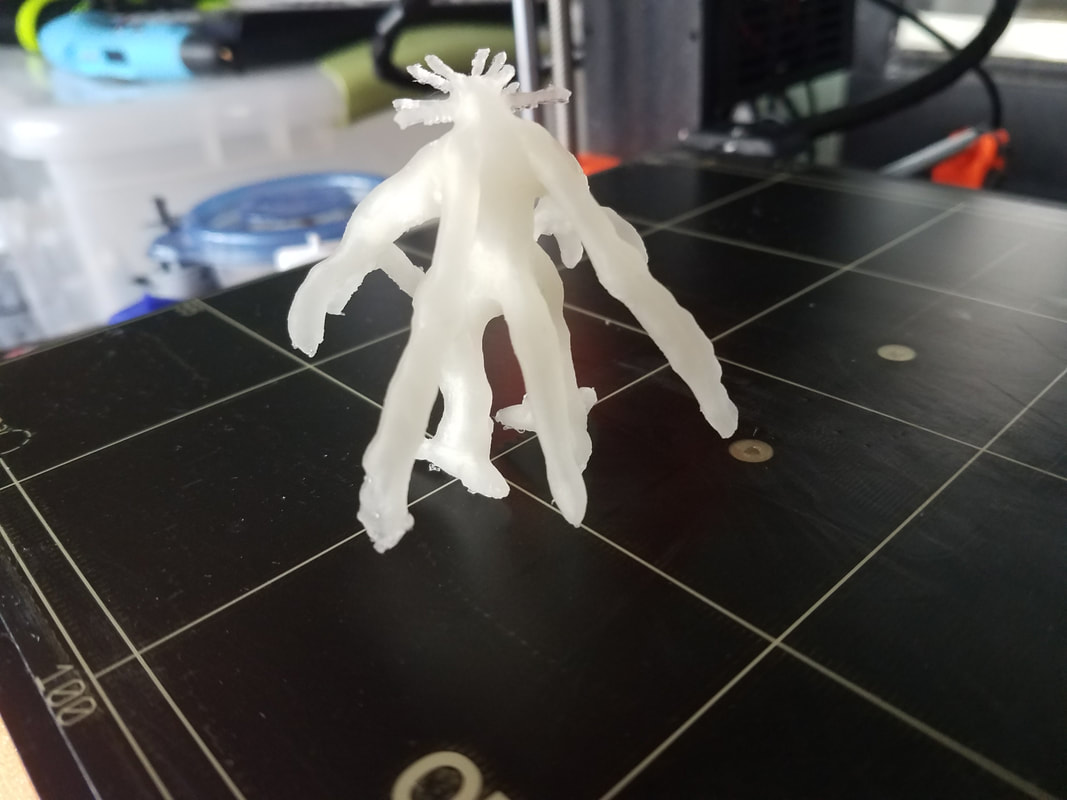 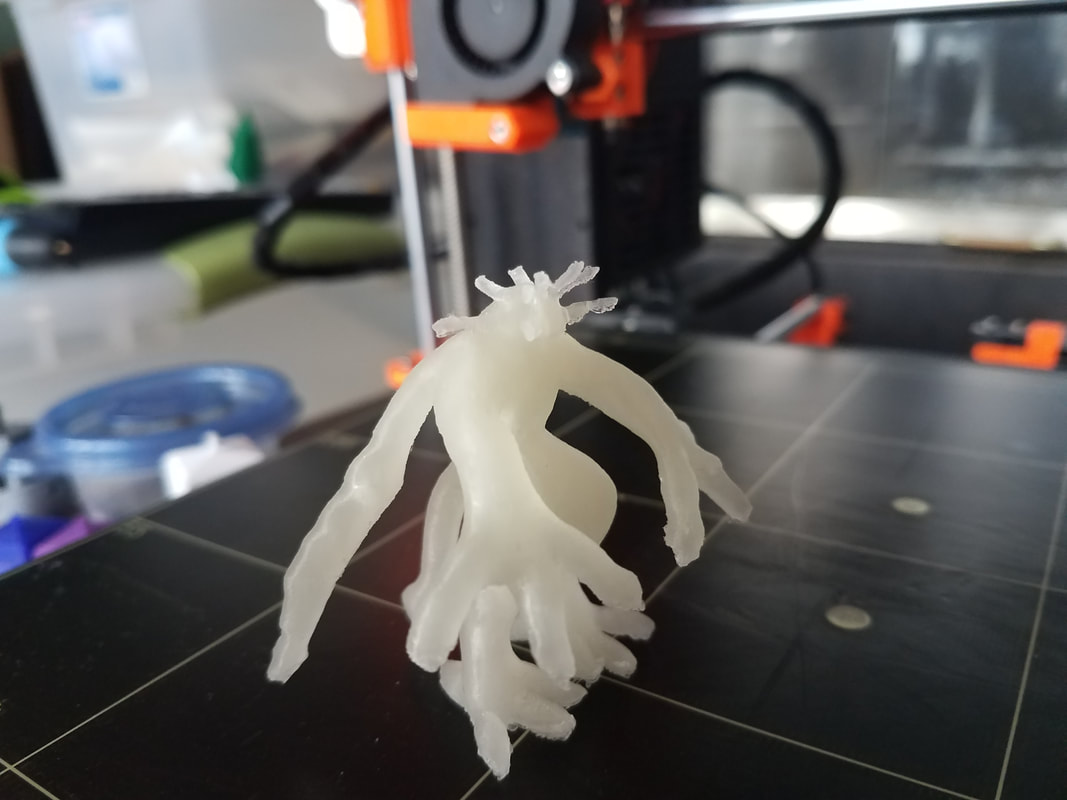 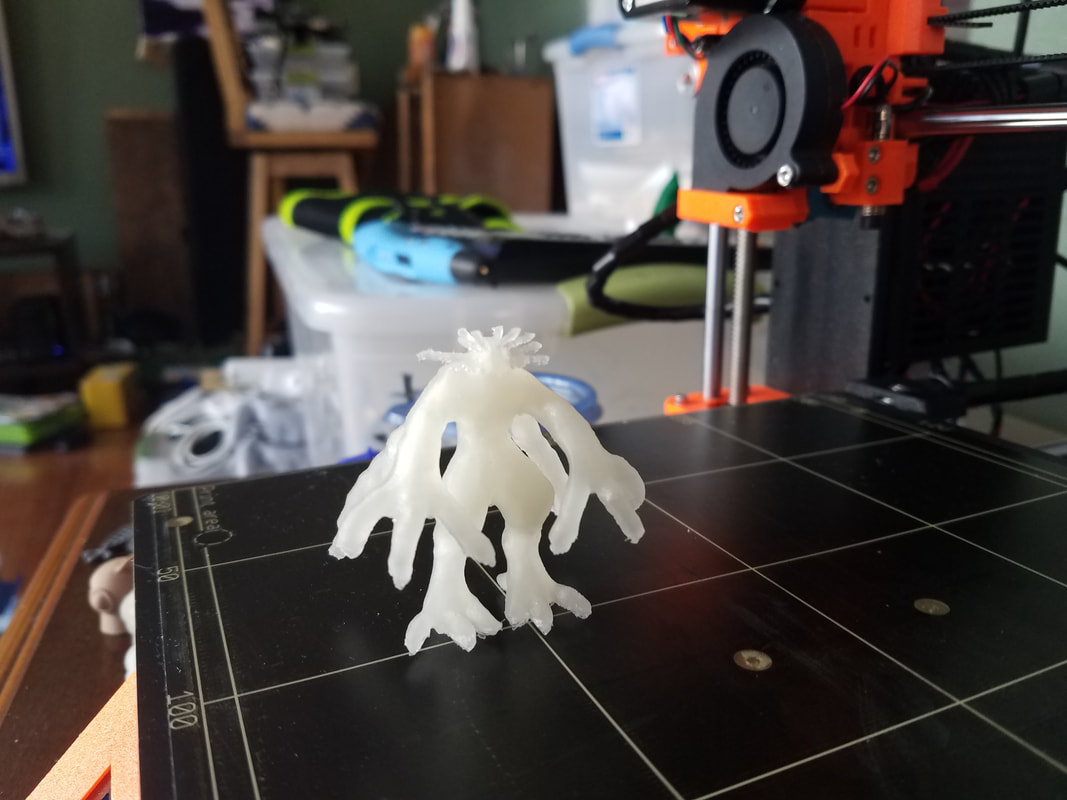 I chose familiar for my blog as I create many plush creatures. To start this one I searched for strange creatures, then reptiles until I found a site that had one I liked. In this case I decided to base a creature off the bipes piporus, or mexican mole lizard, a type of lizard that has two front legs. I decided to change up the creature to have four eyes, horns, sharp teeth, and a furry neck for my design so I sketched it out. 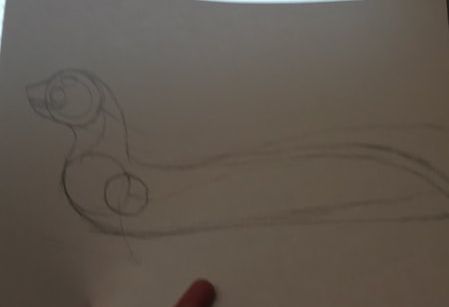 I then edited it further to give 1/4" seam allowance, and created the rest of the body such as the arms. 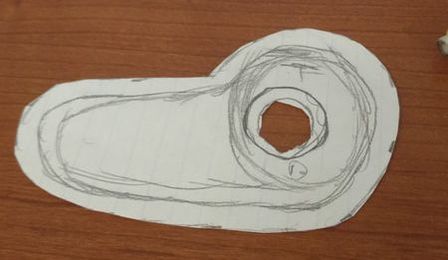 After I had each part I cut it out of the fabric and began to hand sew the areas that would be hard to do on the machine. Once I had the hand sewing mainly done I began to sew the body together using my sewing machine. I chose pink fabric due to the animal's pink color being interesting, and the fact that I had a lot of it, though I chose the fleece I did to go with the faux fur, the black body is because pink and black is a really neat color combination. I chose fleece because it's cheap, I have many colors, and it's easy to work with, and the faux fur was chosen to create the furry texture for the neck. 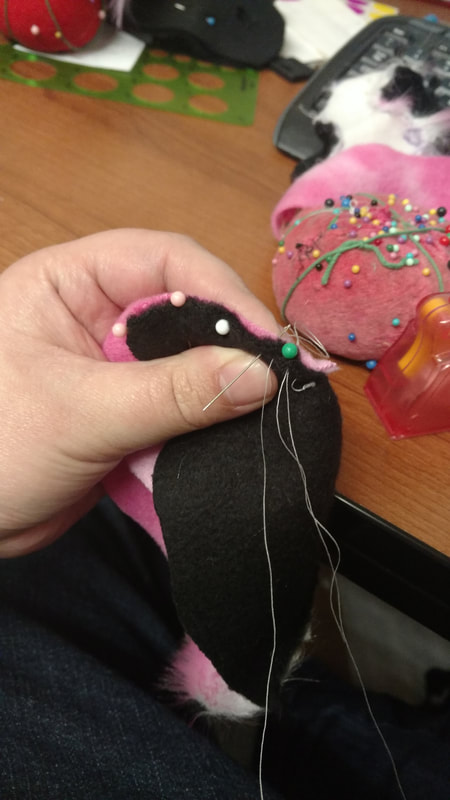 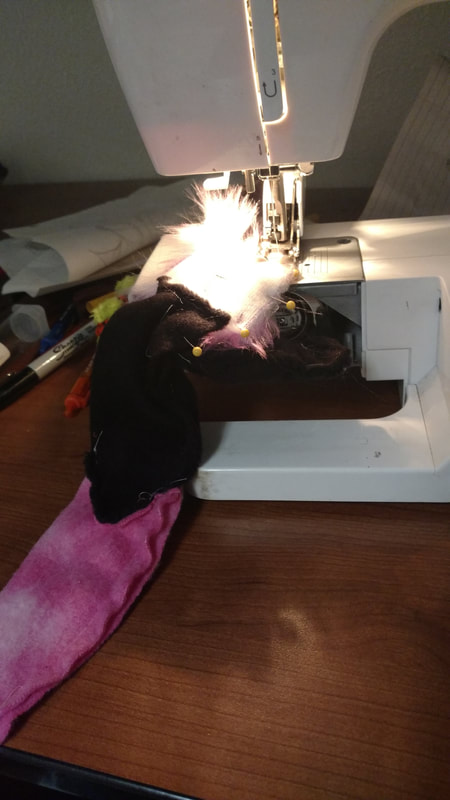 Once it was sewn together, I had to turn it inside out and stuff the plush. 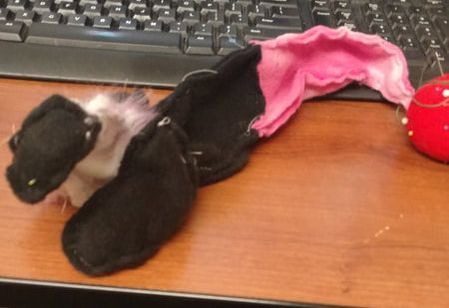 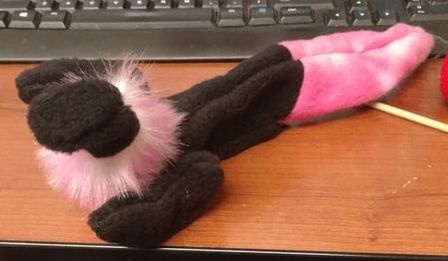 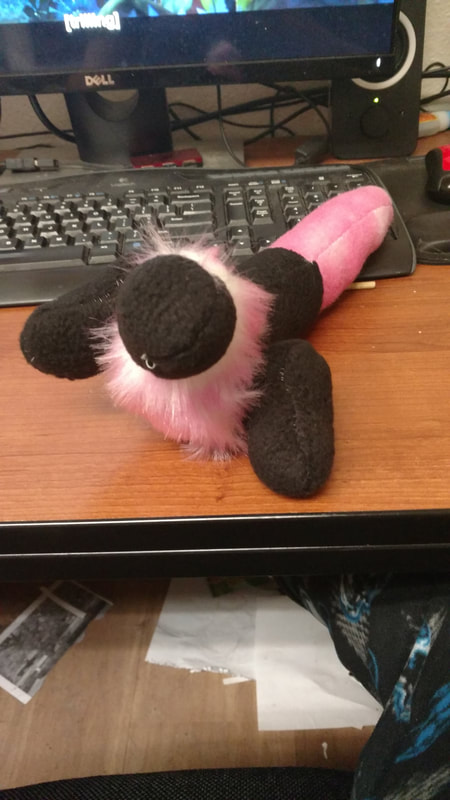 To finish the plush I decided to make the eyes, and use a technique called thread sculpting, which involves putting thread through the plush to have the thread tighten the shape, to refine the shape of the head. I chose green thread for the eyes so that they stood out against the other colors. 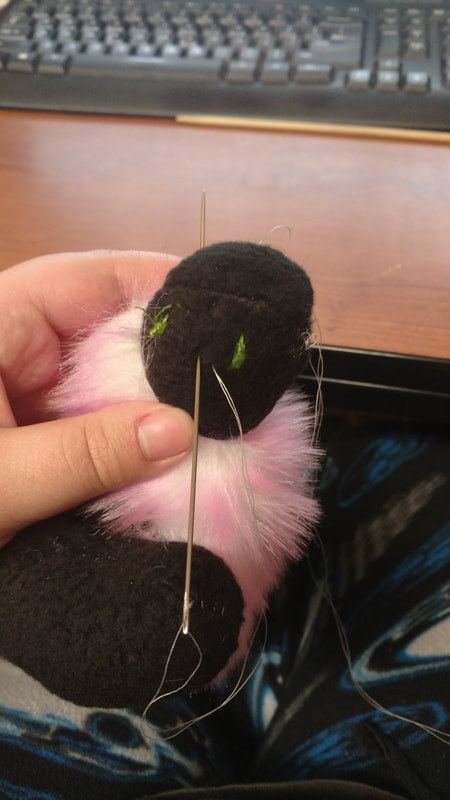 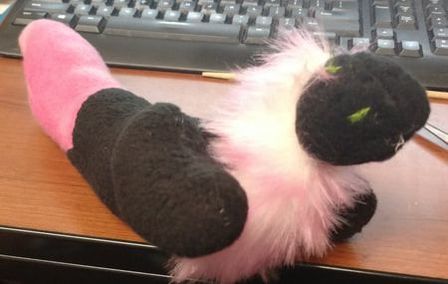 Once again I fell that my main technique is to create it piece by piece. I also wound up making a different mouth using thread sculpting then I originally wanted to, and decided against the horns. Admittedly this is because I forgot about both of these features, so one thing that harms my creativity is when I forget things. My main creative idea for plush creatures is to find an animal, or animals to base the creature off then make the side view, afterwards I trace the side and head a bit to create gussets to make it more 3d, and sometimes, such as for this plush leave a hole in the pattern to attach arms. Also running out of materials as I ran out of one green thread so I had to use a slightly different color. It also wound up much cuter then I was going for. Wojcik, Jonathan. “Top 10 Most Interesting Lizards.” Toptenz.net, 7 May 2014, www.toptenz.net/top-10-lizards.php.
(Citation for where I found out about the mole lizard.) For the problem type here I chose past as I have designed this character before as I wanted a sea creature 3d printed model and had this character ready. I believe that I may have been obsessed with a video game called subnautica at this point and wanted to create my own fearsome sea creature, though nothing like this exists in the game, sometimes I watch a show and get an inspiration/obsession for making a type of creature for example I watch a mecha anime and make a bunch of robots that look nothing like the ones in the show. I also sometimes get inspired by other things such as seeing cuttlefish at the aquarium. In general fur tends to be a trend on my creatures. I might make a plush of this guy as well at some point. 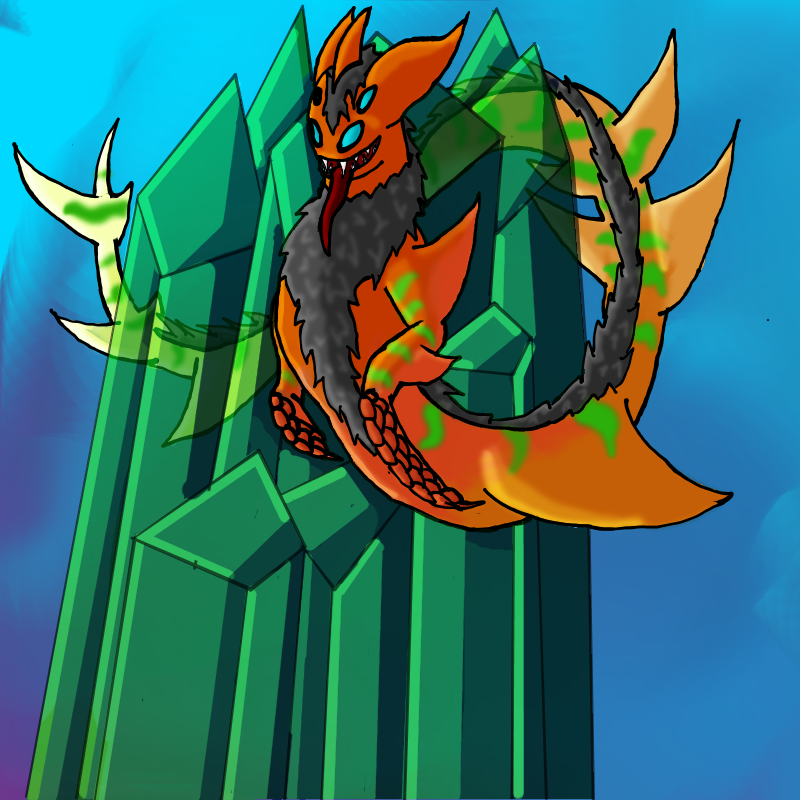 In order to start the model I first made a sphere as it's a good shape for building more organic bodies, then I used the extrusion and translate tools to shape the face better, and removed the bottom of the sphere to cause less problems then extruded the neck. The character has a slight chin to give some mimicry to the original's almost human based face. 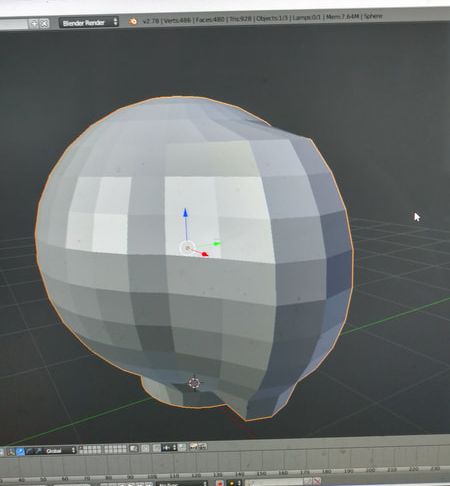 I decided that the torso would look better as another sphere so I created it and added it to the bottom, though not joined yet so I have more freedom to edit it without damaging the head. 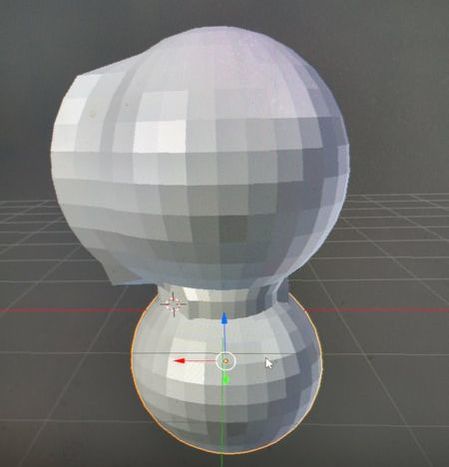 Similar to the neck I removed the bottom of the torso, before removing more in order to have the torso to tail change closer to the drawing. 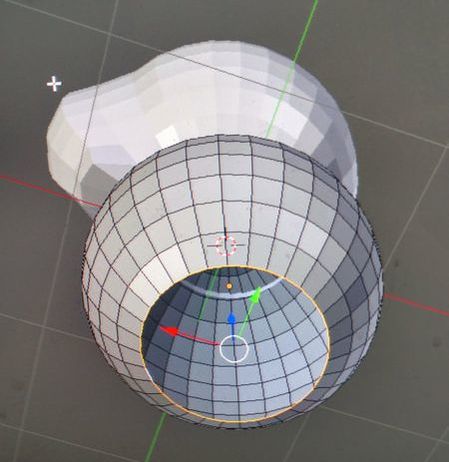 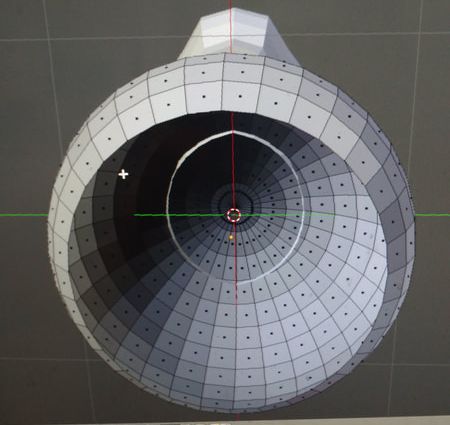 I then select and extrude the edges on the torso while rotating the circle to create a pose for a more interesting final print. At the end I use the option to merge verticies to create the tip of the tail. 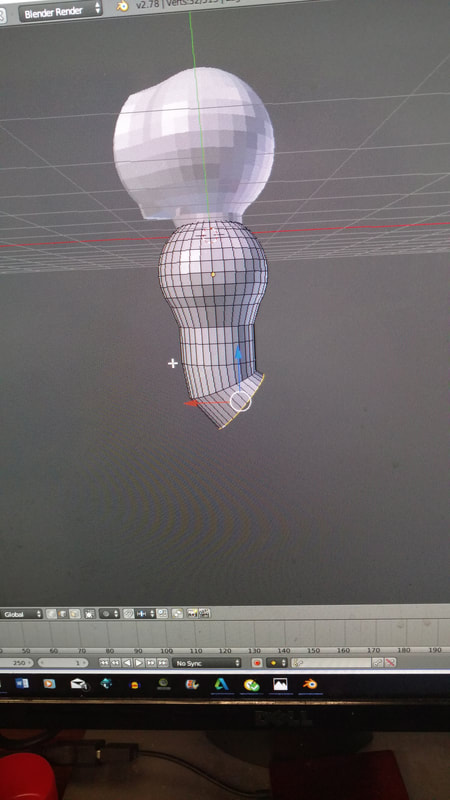 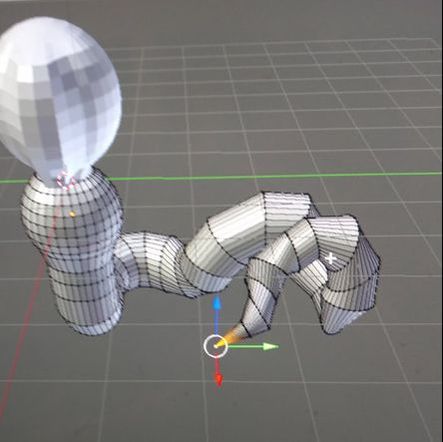 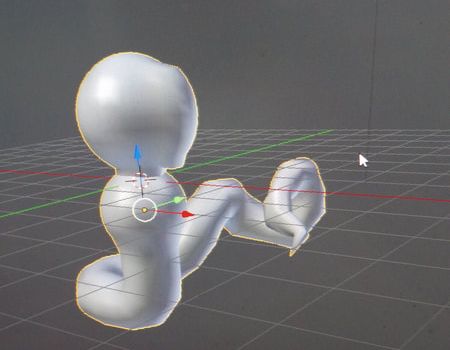
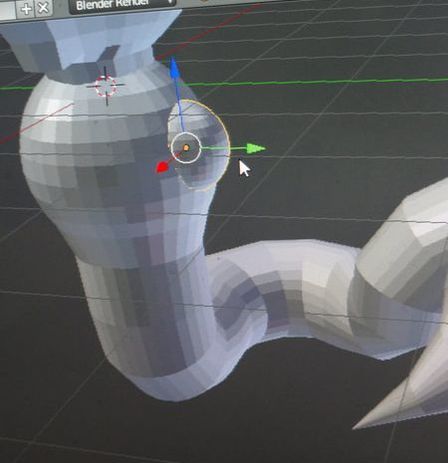   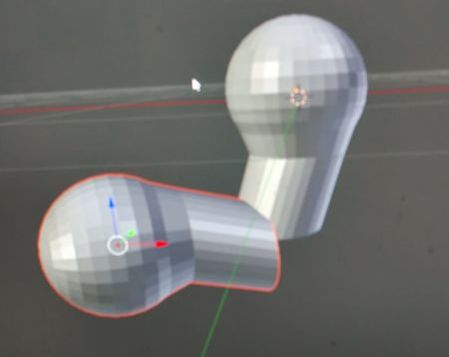 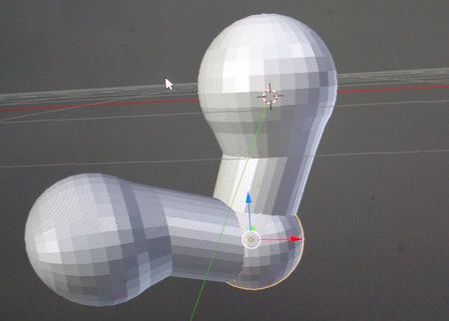 For the scythe like claws, I first wanted to use a cone but they have somewhat annoying geometry so I decided on deleting and extruding part of the sphere instead, I also used join in case I needed to edit areas faster. 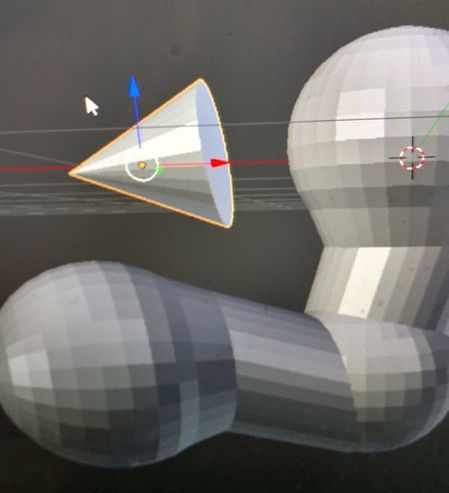 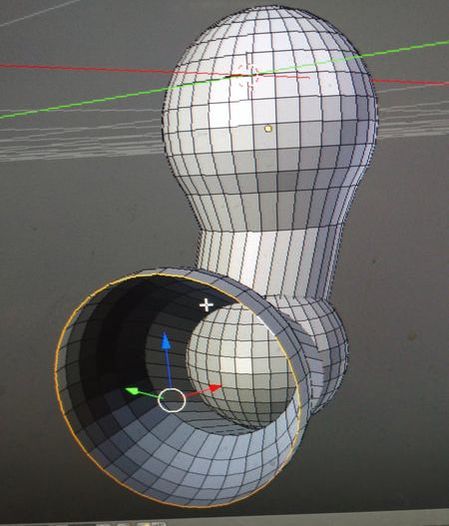  Next I put it on the main body, then I duplicated the arm flipped it by scaling it by negative 1, and posed it so that the arm would not intersect the tail. 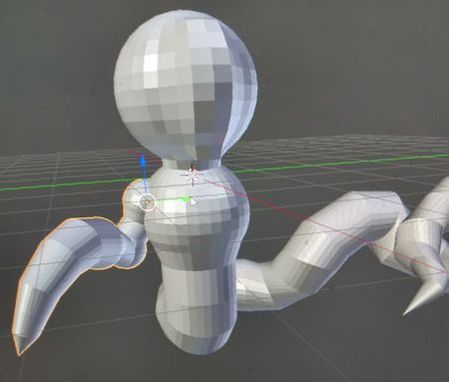 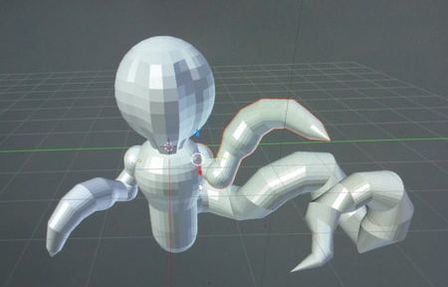 To make the fins I created a cube then subdivided it, for more control over the shape, then pushed the top and bottom down before extruding it while pushing the sides to shape the fin. I did it like this because it's much easier to flatten the cube then to make a plane 3D. I then pulled the edges at the end up to make them more triangular, and duplicated it similarly to the arms.  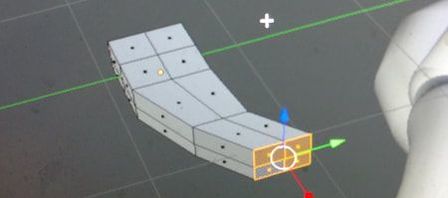 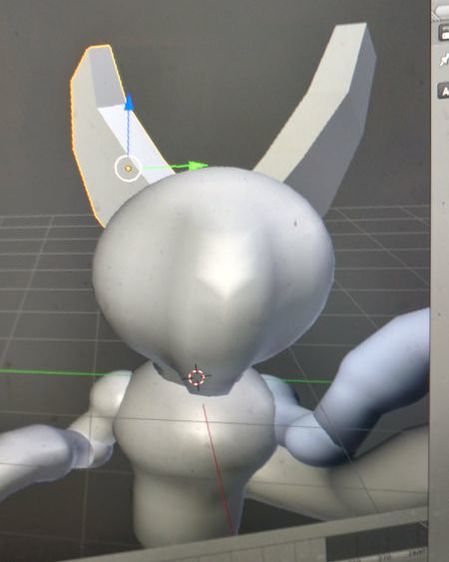 The same fins were then duplicated for the arms, fin in the middle of the head, and body. 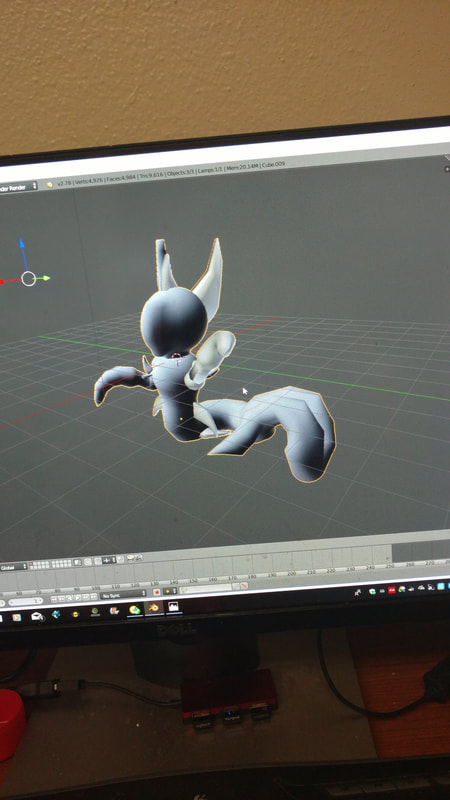 After I had all the fins on I decided to make sockets for the eyes by using the sculpt tool on subtract to carve out areas of the face. 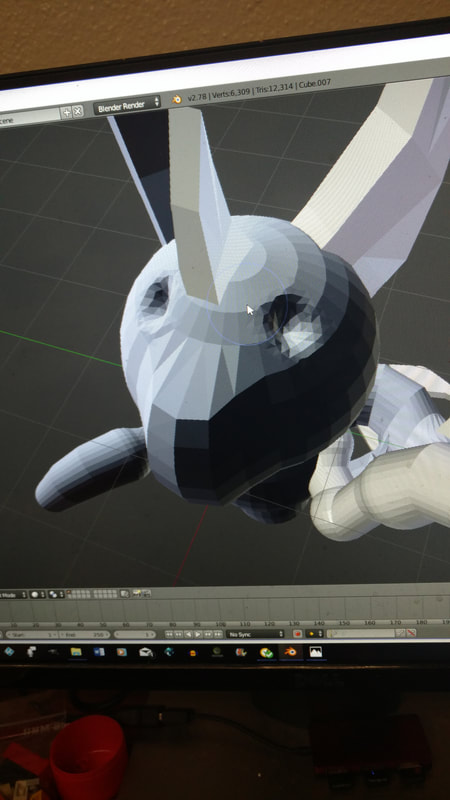 The eyes themselves were duplicated spheres placed inside the dents in the face which I then carved pupils out of. I also carved out a mouth by adding and subtracting. 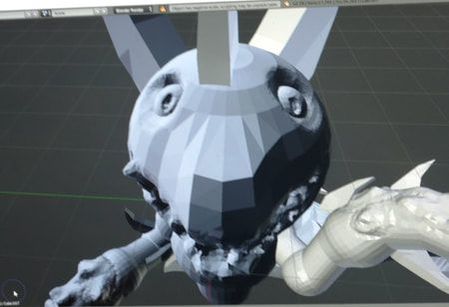 I realized that I forgot the other eyes and made them in the same way to the first ones. 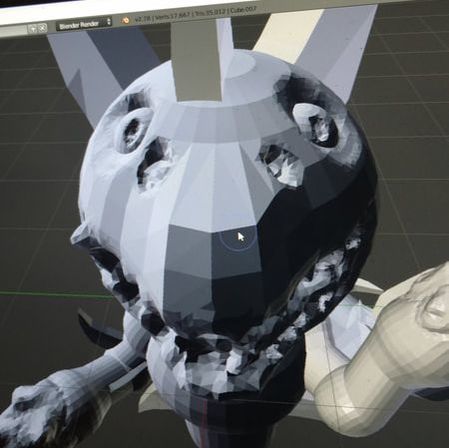 Full picture, note how some areas are a darker grey. 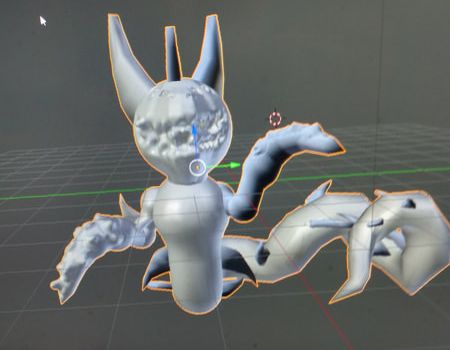 I then sent the model to my dad to 3d print however the result was missing areas of the print, namely the areas in dark grey in the previous image were missing. 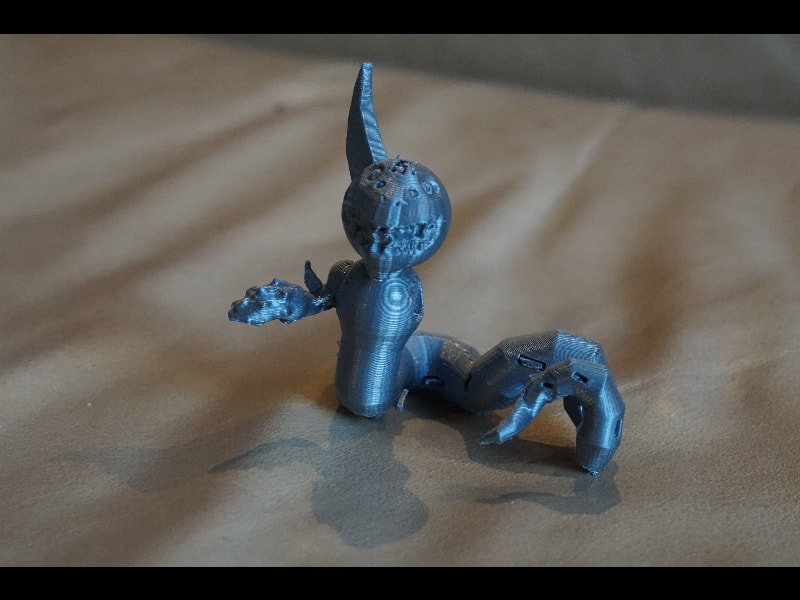 I thought that it was interesting that everything missing was the areas where the sculpting tools were reversed, which I confirmed by testing sculpt on the fins, so I looked up something along the lines of "blender sculpt add subtracts instead" and found out it was because I scaled to flip and that it could be reversed by selecting the areas and pressing "flip normals." Though I later found out my dad had found a much easier solution in importing it to microsoft 3d builder and clicking repair before putting it through the slicer. So my dad attempted to print it again. Below is the settings he used, he said he just used what the program said, and the supports on the failed print and the new one. In general the slicer seems to do it on it's own though you can make some adjustments for more complex prints or possibly edit the supports so that you don't need a flat area. 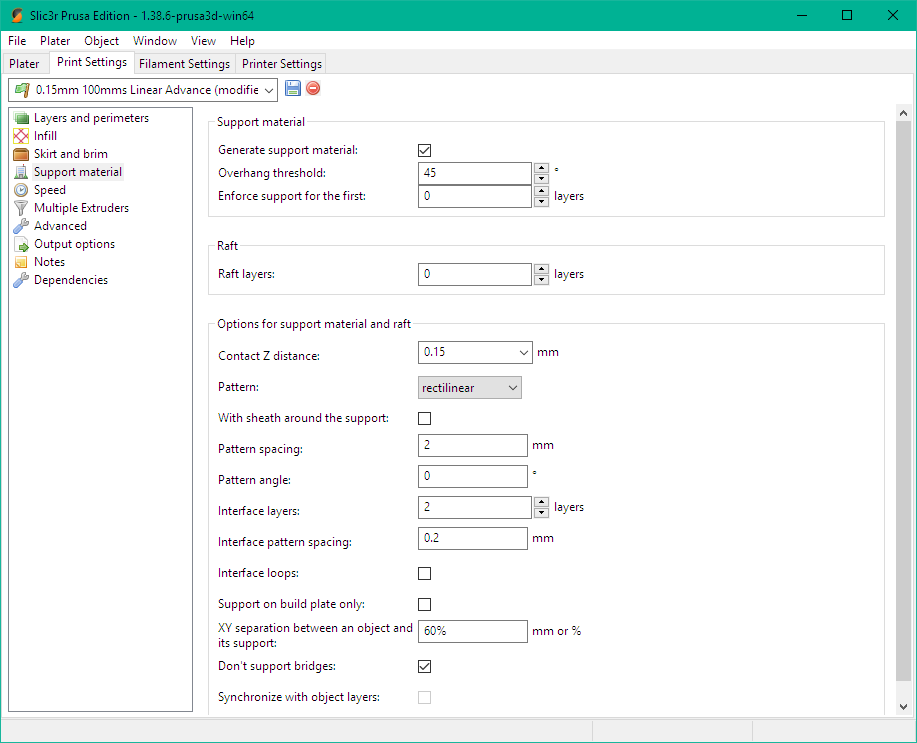 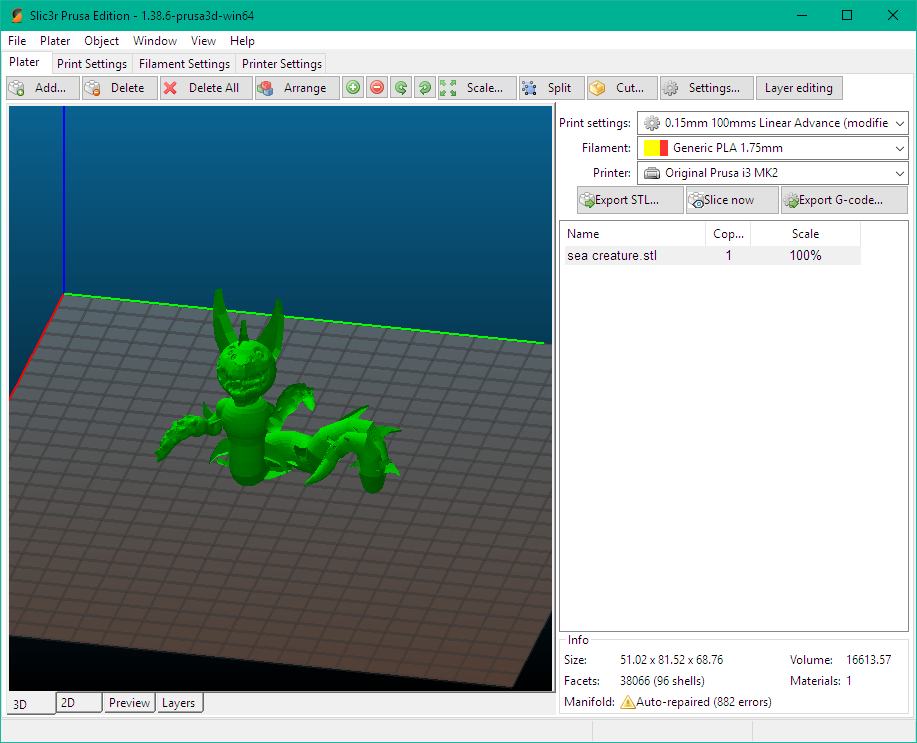 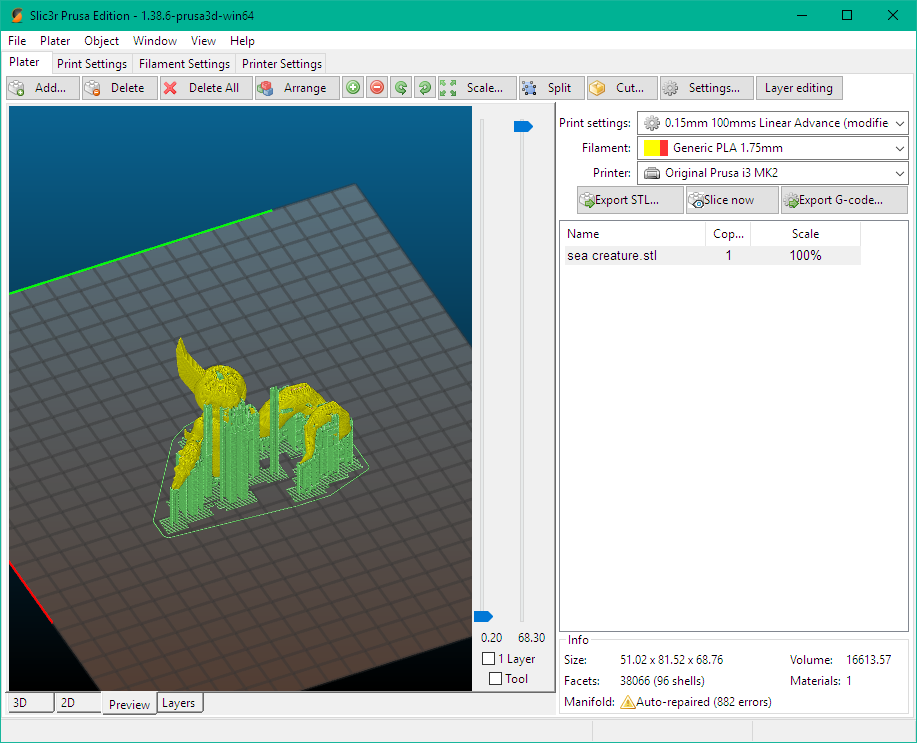 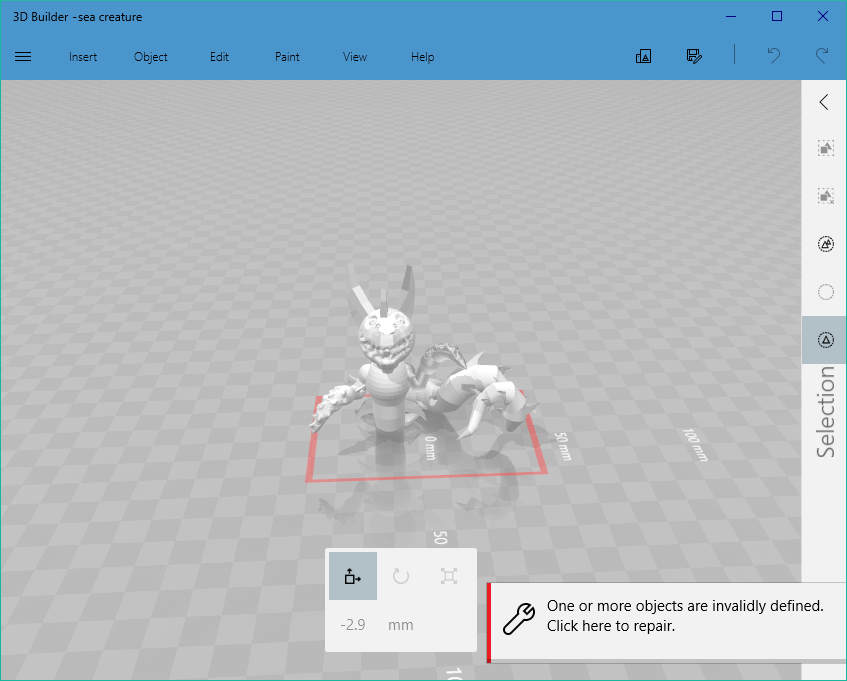 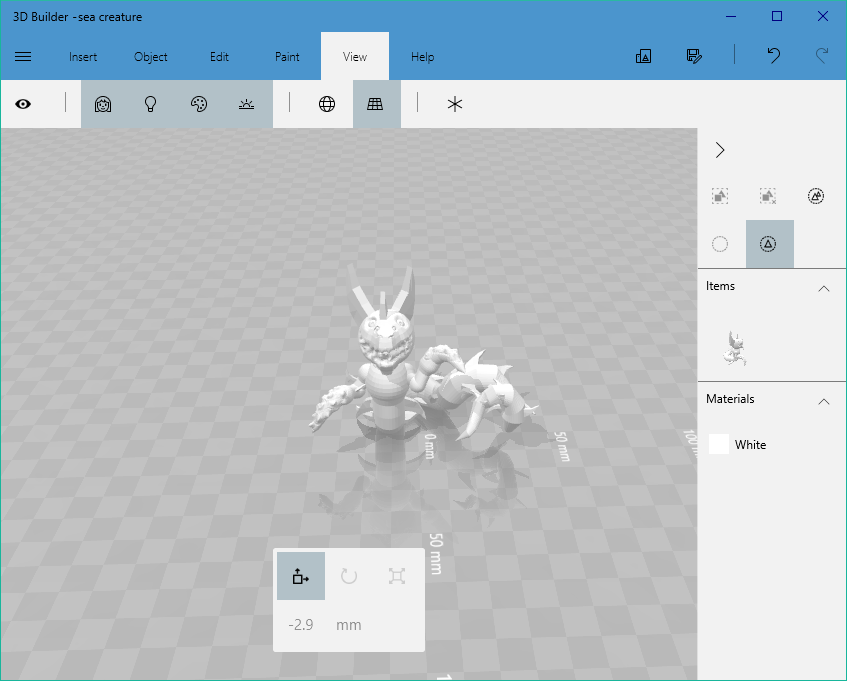 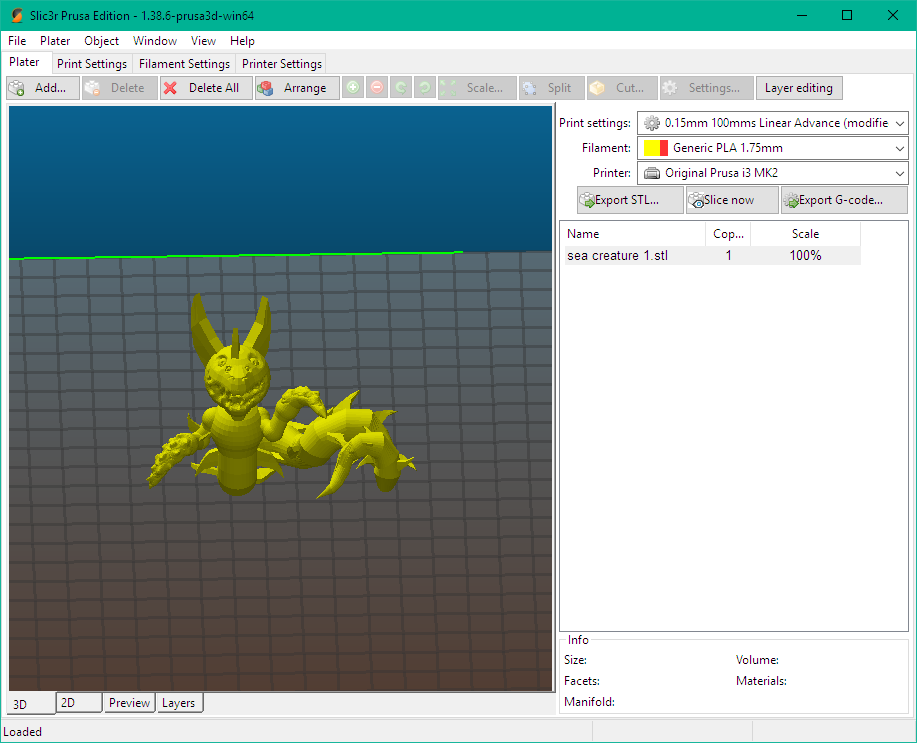 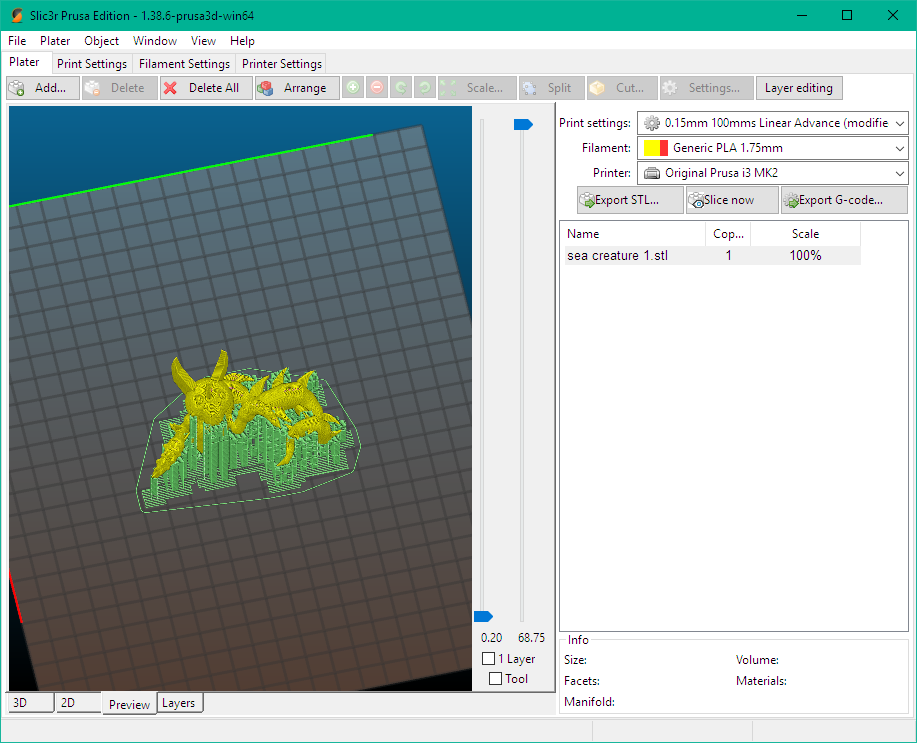 In progress and final result of the print. 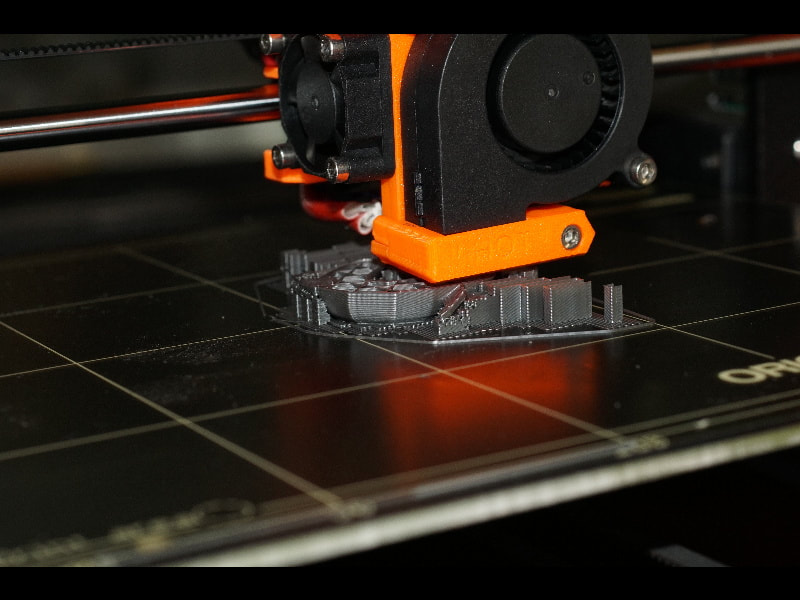 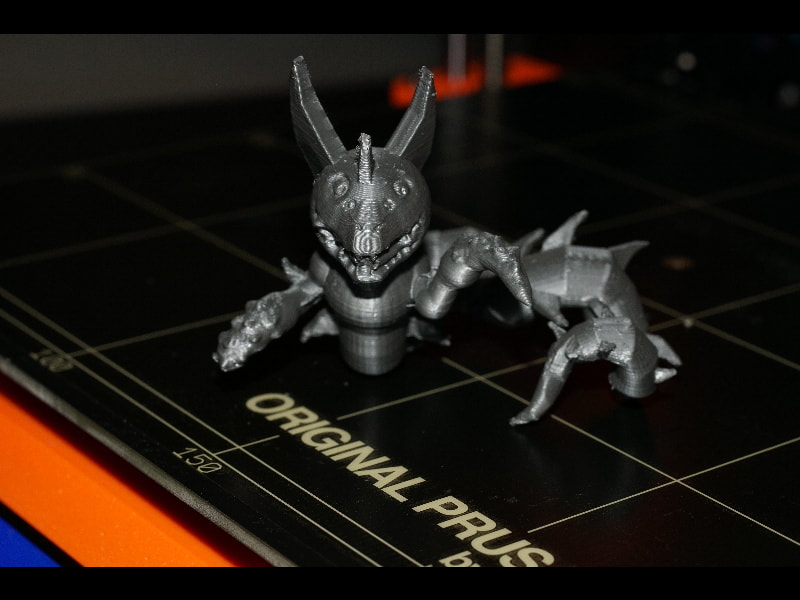 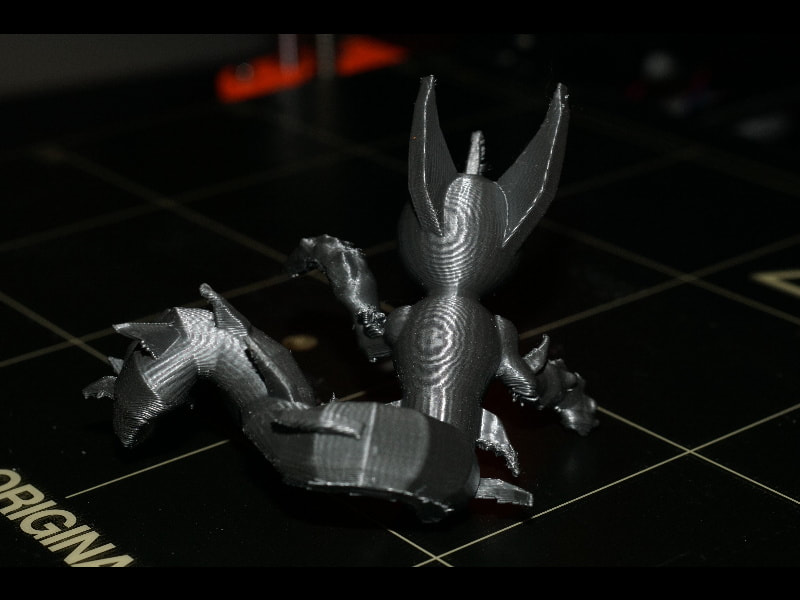 In conclusion my creative strategy usually involves looking up animals to base creatures on, in this case a combination of mermaids and snakes, then sketching them out. I also tend to go more for trial and error and simply doing it without thinking about much more than how it will look in the end. Solving problems as the appear more than anticipating them, and that my creativity is more on character design and making those designs come to life while I have very little in math. I learned that I can avoid this problem by flipping flipped parts the instant I create them so I can select it all at once.
I decided against the fur in part because I might have forgotten about it and in part because it's a really hard detail to make in blender. I heard about a free 3d sculpting program called sculptis so I might download it sometime to try that one as it sounds easier than moving the mesh and faces around. |
AuthorWrite something about yourself. No need to be fancy, just an overview. ArchivesCategories |
 RSS Feed
